The installation takes a little while, but it can be done by one person.
For me, the removable anchors, like sleeve anchors, in the packaging were not useful. When I started drilling the 2 holes, I realized that I had 6cm of insulation material until I found the ceiling plate. So, I needed anchors that allow for a material thickness of at least 7cm, and I bought wedge anchors (I found them on Skroutz in packs of 4) that have better strength. And make sure to get drills specifically for concrete or reinforced concrete, in two sizes, so that you can first open a small guide hole and then the regular one where the anchor will go. Don't forget to remove the dust from the hole, otherwise the anchor won't hold well. Be careful not to inhale or get the dust in your eyes. I first scraped it with a wire, having a damp cloth underneath, but it also needs blowing (at worst, with a straw).
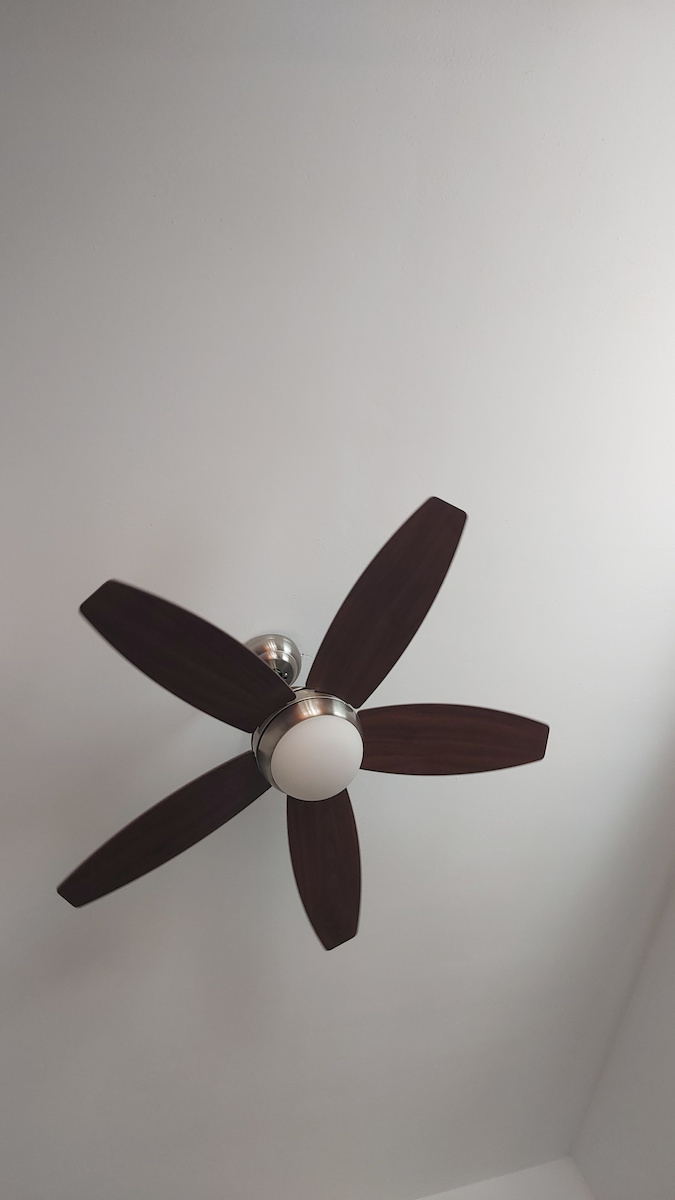
Note that after installing the base, you should hang it assembled without tightening all the screws, almost the entire body except for the wings, lamp, and glass dome. For convenience, remove the screws for the wings beforehand.
Finally, when you put the bottom part with the lamp, be careful with the screwing, if you tighten it too much, it might go in crooked and hinder rotation. If you made the mistake of putting on the glass and tightening it too much (I did), know that it comes off relatively easily. If you pushed it too hard and it doesn't "unscrew," loosen it with a small screwdriver in multiple places (put the flat tip between the glass and the frame all around). It's better to test the fan before starting with the lights.
It doesn't have LED bulbs, but E9 socket (screw-in large), as mentioned in another comment.
For now, I'm using it on medium and I'm satisfied (I installed it during the hot weather of July 21). It won't cool the air (it's not an air conditioner), but it will provide a continuous breeze, especially if you're within its range (or better yet, cone of action).
I bought the fans last year for 65€ and due to travel restrictions, they stayed in another house in their box. I should have bought them for the other rooms as well.
Update:
I bought and installed 3 more in cherry, beige, and white colors. And I discovered some issues.
The white one is not completely white, but a silver body with white wings. I don't know if there is an all-white model, but with the silver body, the wooden-colored wings look much better.
One of them needs balancing or one screw needs more tightening because even at low speed, it shakes. Balancing has a process (I wait for the rotation to stop on its own each time, otherwise there is a risk of causing more damage). <-- The screws on the support were not tightened properly.
One of them was missing batteries.
One of the metal bases had smaller holes than the others. The diameter was fine for the provided screws, but as I mentioned, I prefer anchors with a larger diameter. So, I had to file them (I had a thin metal file, and it took about 10 minutes without much effort).
Now, I plan to solve the issue with the bulb by using a GX53 socket and bulb. <-- I changed the socket and now I no longer have the problem of the bulb illuminating one side more. I used double-sided tape and simply attached the GX53 socket in the center, it might need to be reattached in some time.
Attention, obviously filing and replacing the socket will affect/cancel part or all of the warranty.
Update 2023: They continue to work flawlessly.
Note for installers: prefer a distance between the anchors of ~11.5cm if your fan base allows it. I have encountered bases with different openings on different fans, which is logical since there is no standard. I provide the minimum and maximum openings, the screw or anchor should be within these, so calculate half the thickness of the screw/anchor:
8.5-12cm.
10-12cm.
10.5-14cm.
11-15cm.
Η τοποθέτηση θέλει λίγη ώρα, αλλά γίνεται και από ένα άτομο.
Σε εμένα τα εκτονούμενο αγκύρια, τύπου sleeve anchor, της συσκευασίας δε μου ήταν χρήσιμα. Όταν ξεκίνησα να ανοίγω τις 2 τρύπες συνειδητοποίησα ότι έχω και 6εκ μονωτικού υλικού μέχρι να βρω την πλάκα οροφής. Οπότε χρειάστηκα αγκύρια που να επιτρέπουν πάχος υλικού τουλάχιστον 7εκ και αγόρασα wedge anchor (βρήκα στο Skroutz σε ποσότητες των 4τεμ) που έχουν καλύτερες αντοχές. Και τρυπάνια πάρτε ειδικά για μπετό ή ενισχυμένο μπετό και σε δυο μεγέθη ώστε πρώτα να διανοίξετε μια μικρή τρύπα οδηγό και μετά την κανονική που θα μπει το αγκύριο. Μη ξεχάσετε να βγάλετε τη σκόνη από τη τρύπα αλλιώς δεν θα πιάσει καλά το αγκύριο. Προσοχή μην εισπνεύσετε ή μπει στα μάτια η σκόνη που θα βγει. Εγώ πρώτα τη σκάλισα με ένα σύρμα έχοντας ένα βρεγμένο πανί από κάτω αλλά θέλει και φύσημα (στη χειρότερη με ένα καλαμάκι).
Να ξέρετε ότι αφού τοποθετήσετε τη βάση θα πρέπει να κρεμάσετε συναρμολογιμένο χωρις να έχετε σφίξει όλες τις βίδες σχεδόν όλο το σώμα πλην φτερών, λάμπας και γυάλινου θόλου. Για ευκολία αφαιρέστε τις βίδες των φτερών από πριν.
Τέλος όταν βάζετε το κάτω μέρει με τη λάμπα προσέχετε στο βίδωμα αν σφίξετε πολύ ίσως μπει στραβά και εμποδίζετε η περιστροφή. Αν δε κάνατε το λάθος να βάλετε και το γυαλί και το έχετε παρασφίξει (παθών) να ξέρετε ότι βγαίνει σχετικά απλά, αν το έχετε σπρώξει πολύ και δε "ξεβιδώνεται" ξεσφίξτε το με ένα μικρό κατσαβίδι σε πολλά σημεία (βάλτε τη πλατιά μύτη ανάμεσα στο γυαλί και το πλαίσιο γύρω γύρω). Καλύτερα να δοκιμάσετε τον ανεμιστήρα πριν ξεκινήσετε με τα φώτα
Δεν έχει λάμπα led, αλλά ντουί Ε9 (βιδωτό μεγάλο), όπως αναφέρει και άλλο σχόλιο.
Για την ώρα το δουλεύω στο medium και είμαι ικανοποιημένος (το τοποθέτησα στις μεγάλες ζέστες του Ιουλίου 21). Δε θα κρυώσει τον αέρα (δεν είναι air condition), αλλά θα δίνει ένα συνεχές αεράκι ειδικά, αν είσαι στην ακτίνα (ή καλύτερα κώνο) δράσης του.
Είχα πάρει τους ανεμιστήρες πέρυσι στα 65€ και λόγω περιορισμών μετακίνησης είχαν μείνει σε άλλο σπίτι στο κουτί τους, έπρεπε να είχα πάρει και για τα άλλα δωμάτια.
Ενημέρωση
Αγόρασα και εγκατέστησα άλλους 3 σε χρώμα κεράσι, βενγκέ και λευκό. Και ανακάλυψα κάποια θέματα.
Ο λευκός δεν είναι ολολευκος, αλλά ασημί σώμα με λευκά πτερύγια. Δε ξέρω αν υπάρχει και ολόλευκο μοντέλο, αλλά με το ασήμι σώμα τα πτερύγια σε χρώμα ξύλου φαίνονται σαφώς καλύτερα.
Ένας χρειάζεται ισοστάθμιση ή κάποια βίδα θέλει περισσότερο σφίξιμο γιατί ακόμα και στην χαμηλή ταχύτητα τρέμει. Η ισοστάθμιση έχει διαδικασία (περιμένω να σταματήσει κάθε φορά η περιστροφή από μόνη της αφού διαφορετικά υπάρχει κίνδυνος να κάνω μεγαλύτερη ζημιά). <-- Δεν είχαν βιδωθεί σφιχτά οι βίδες στο στήριγμα.
Σε έναν έλειπαν οι μπαταρίες.
Μια από τις μεταλλικές βάσεις είχε οπές μικρότερης διαμέτρου από τους άλλους. Η διάμετρο ήταν θα χαρά για τις παρεχόμενες βίδες, αλλά όπως έγραψα χρησιμοποιώ καλύτερα αγκύρια μεγαλύτερης διαμέτρου. Οπότε χρειάστηκε να τις λιμάρω (είχα μεταλλική λεπτή λίμα, και μου πήρε στο χαλαρό κανα 10' χωρίς ιδιαίτερο κόπο).
Σκοπεύω τώρα να λύσω το πρόβλημα της λάμπας χρησιμοποιώντας ντουι και λάμπα GX53, <-- Άλλαξα το ντουί και τώρα δεν έχω πια το πρόβλημα με το γλόμπο να φωτίζει περισσότερο τη μια πλευρά. Χρησιμοποίησα ταινία 2πλής όψεως και απλά κόλησα το ντουί GX53 στο κέντρο, πιθανότατα θα χρειαστεί να το ξανακολήσω σε κανένα χρόνο.
Προσοχή, προφανώς το λιμαρισμα και η αντικατάσταση του ντουι θα επηρεάσει/ακύρωση μέρος ή όλη την εγγύηση.
Ενημερώση 2023: Συνεχίζουν ακάθεκτοι.
Σημείωση για εγκαταστάτες: προτιμήστε απόσταση μεταξύ των αγκυρίων ~11,5εκ αν το επιτρέπει η βάση του ανεμιστήρα σας. Έχω συναντήσει βάσεις με διαφορετικά άνοιγμα σε διαφορετικούς ανεμιστήρες, λογικό αφού δεν υπάρχει κάποιο πρότυπο. Παραθέτω τα ελάχιστα και μέγιστα ανοιγμάτων, η βίδα ή το αγκύριο πρέπει να είναι μέσα σε αυτά οπότε υπολογίστε και το μισό πάχος της βίδας/αγκυρίου:
8.5-12εκ.
10-12εκ.
10,5-14εκ.
11-15εκ.