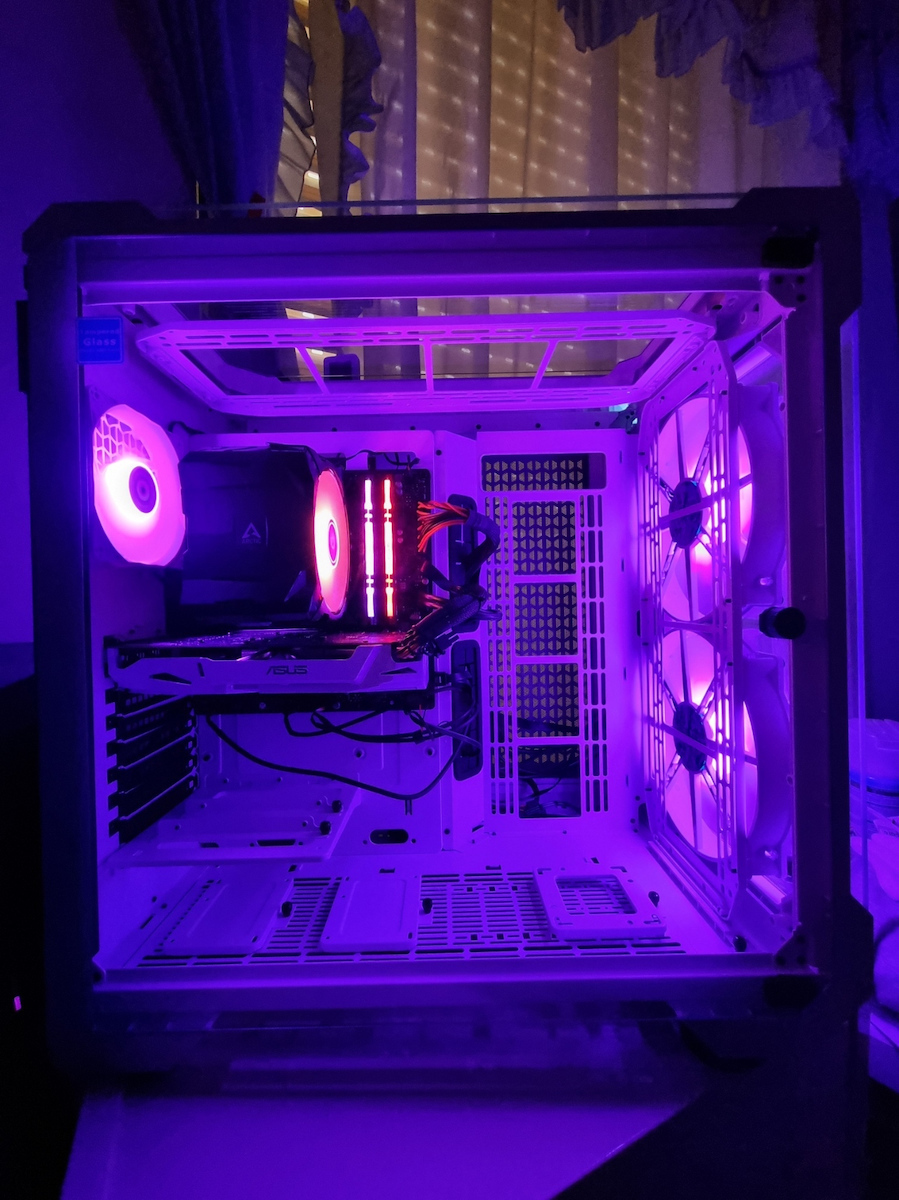
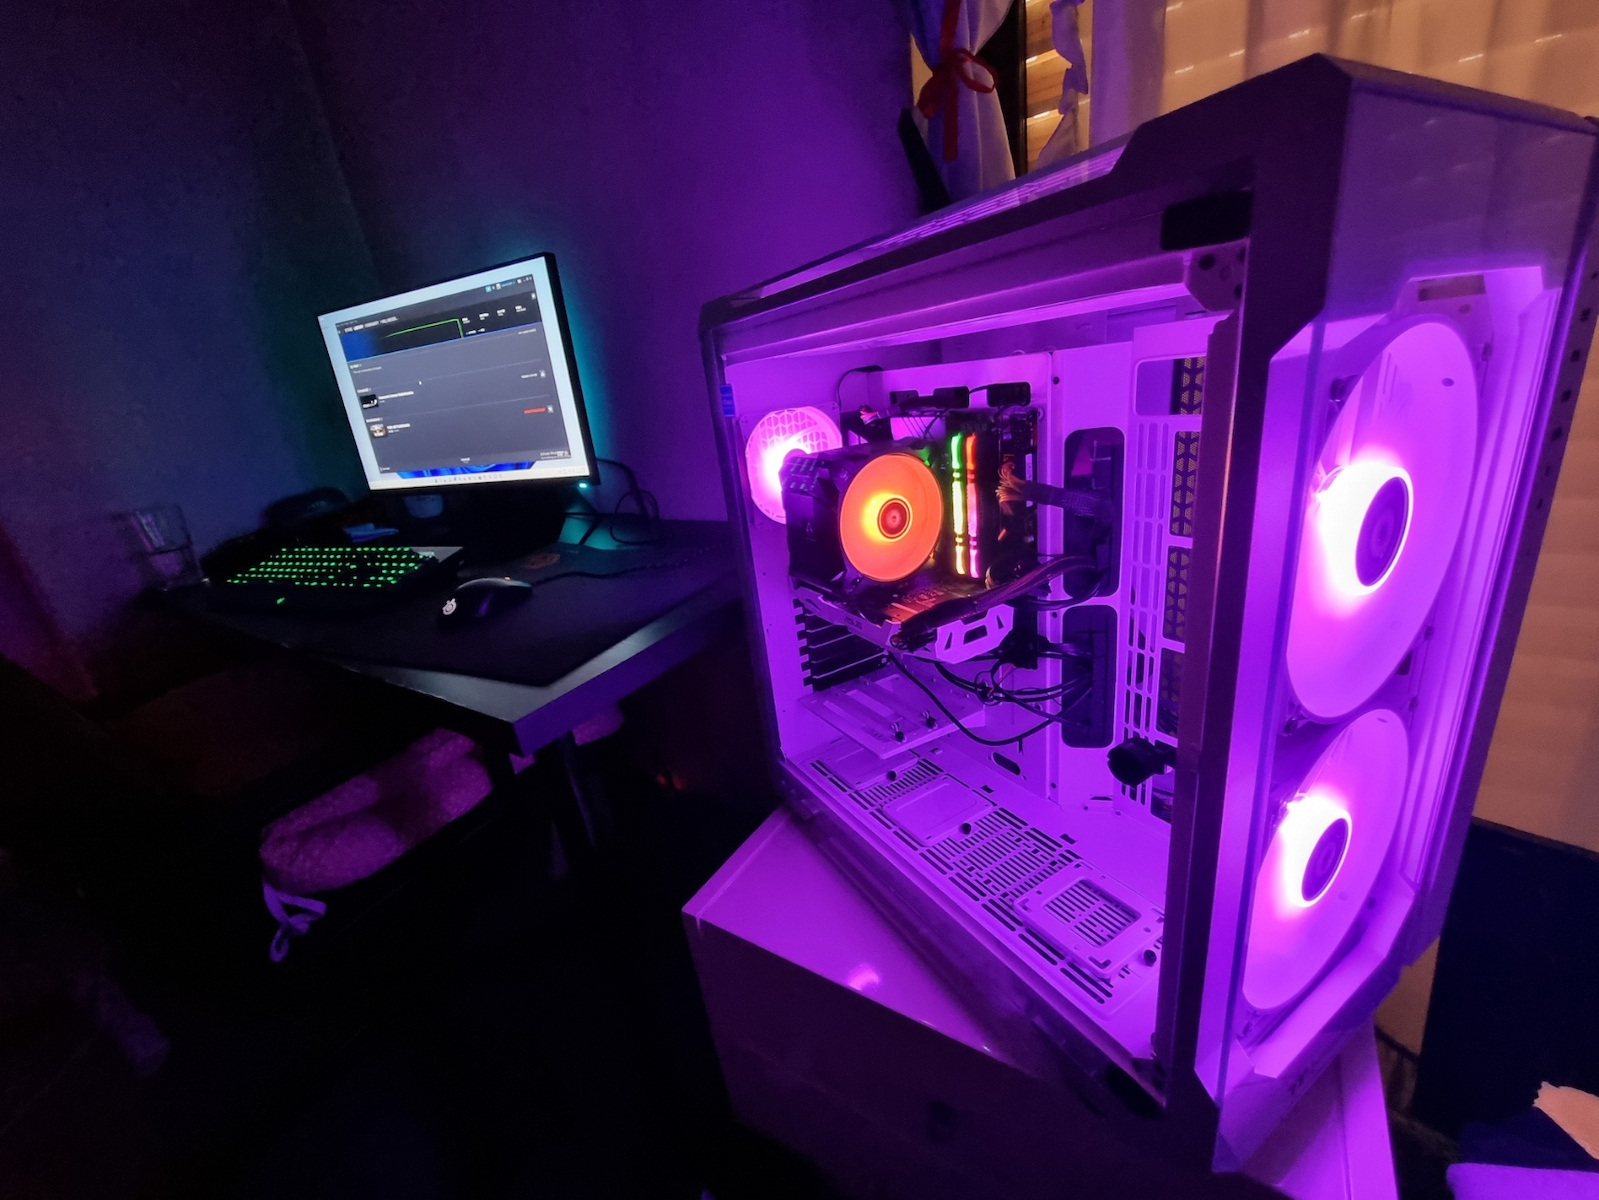
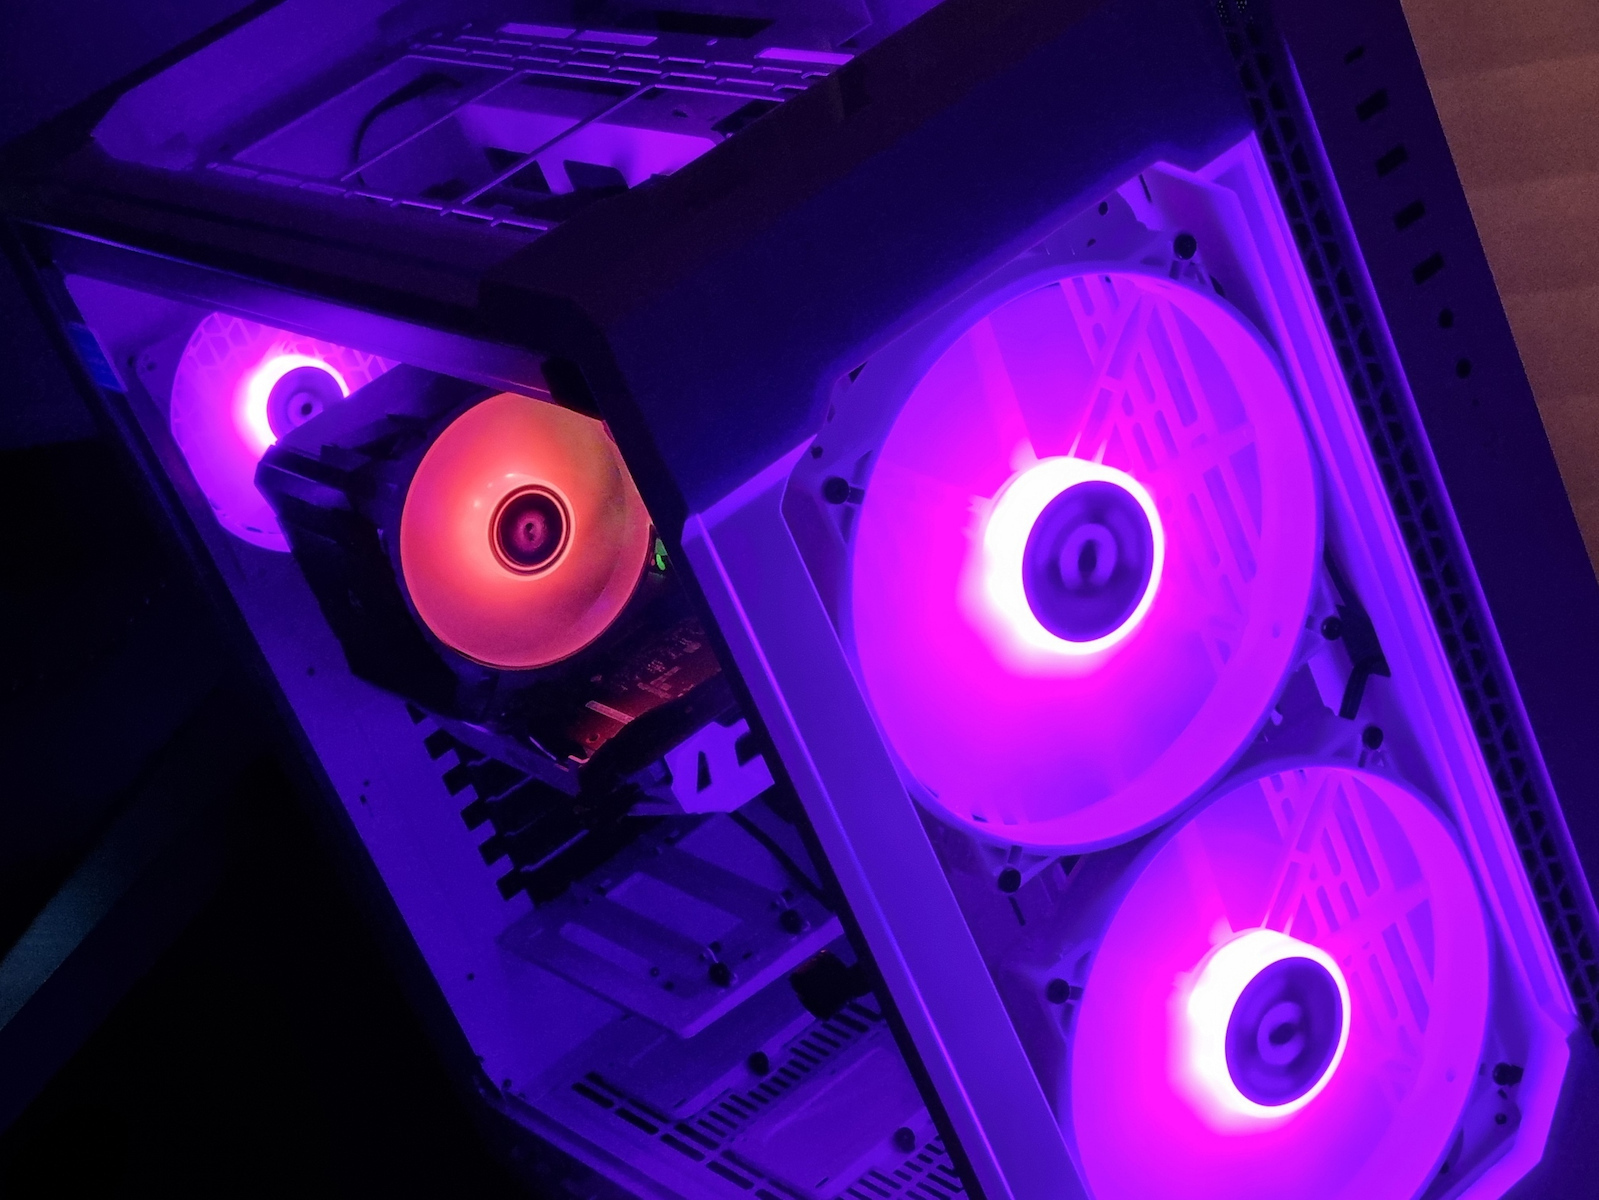
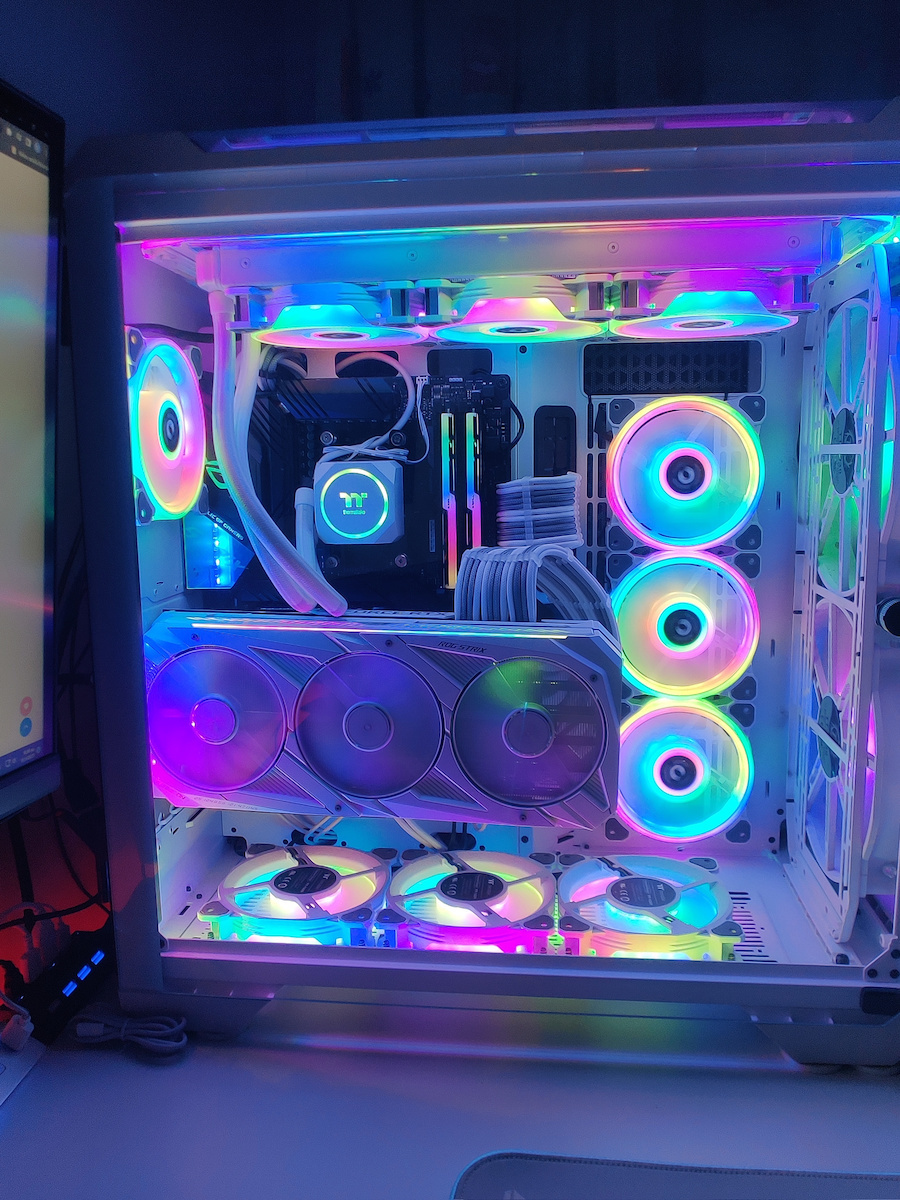
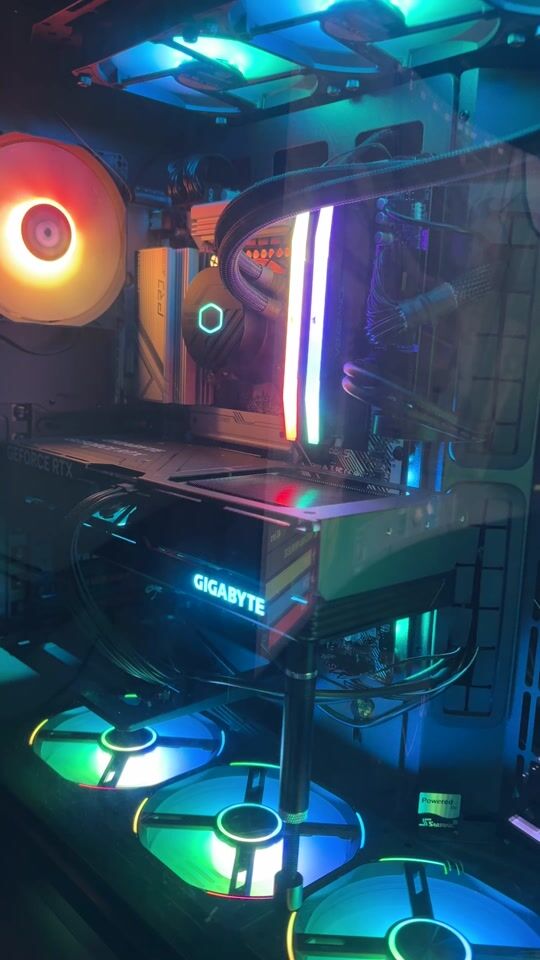
It is very beautiful but it is aimed at those who will install custom water cooling. The glass panels do a good job only in dust filtering and a poor job if you are thinking of removing heat from the side vents or allowing a large volume of air to enter. It is very large and only has 2 slots for 3.5'' HDDs. Also, do not buy a case with a controller, let the motherboard handle everything.
The airflow is designed to take in air from the top and send it downwards. Obviously, because the case is large, they thought that people would have it on the floor, so this is the best way to prevent dust buildup. However, if I choose to install the water cooling on top, the hot air falls directly onto the VRM, even if I move the position of the top grille towards the front. So I don't consider it a good idea. I tried it and the temperature on my processors is 1 degree higher as soon as I turn on the computer, and the liquid reaches 2 degrees higher shortly after, with the processor reaching 3-4 degrees higher. Just as I don't think it's a good idea for the hot air to pass through the inside if I install the water cooling in the front or on the side.
As they designed it, the best position for water cooling is at the bottom, removing the bottom grille that filters the air and the slots for additional hard drives. However, with the AIO water cooling that I have, the tubes are not long enough to fit the radiator at the bottom (photo).
So, since I have the case on a desk, I installed the water cooling on top with reverse flow from bottom to top without worrying about dust. Initially, I tried using the two 200mm fans (which needed to be raised with the adhesive pads included in the case). However, since I didn't have intake air, I decided that it's a bad idea to have a push-pull configuration upwards.
The glass panels are good for filtering air as intake, but they are bad for removing a large volume of air. With the removal of the top part and the airflow from bottom to top, the temperature of the AIO liquid cooling is 2 degrees lower. But because I didn't put the top part at night when I shut down the computer, the case filled with dust. I solved this by placing the bottom grille that filters the air from below in the empty space next to the radiator, and with the top part of the case permanently removed.
So, 3 stars for the inflexible design of the case's airflow.
For the 6-pin connection of the three fans, because the fans are controlled only by the controller+motherboard together. I already replaced the 120mm fan with a 4-pin+argb to have it at the back where I don't see it with lighting, and I usually keep the front 200mm fans with the lighting off.
For the motherboard-controller cable, which I would have liked a bit longer.
And the worst part is that you can't fit many hard drives, a midi case like this example https://www.skroutz.gr/s/36151834/Phanteks-Eclipse-P600S-Gaming-Midi-Tower-%CE%9A%CE%BF%CF%85%CF%84%CE%AF-%CE%A5%CF%80%CE%BF%CE%BB%CE%BF%CE%B3%CE%B9%CF%83%CF%84%CE%AE-%CE%BC%CE%B5-%CE%A0%CE%BB%CE%B1%CE%AF%CE%BD%CF%8C-%CE%A0%CE%B1%CF%81%CE%AC%CE%B8%CF%85%CF%81%CE%BF-Matte-White.html?from=account_favorites has more slots for hard drives than this full tower case, the size is unnecessary, this case is only needed for custom water cooling. It is stated in the information, but I didn't check it, I thought that HDDs would fit at the bottom. It requires an HDD cage that doesn't exist. The 2.5 to 3.5 adapters don't work, they have the size of a 3.5'' hard drive but they don't fit a 3.5'' disk.
Of course, if you don't have a bunch of old hard drives, you can buy two 4TB disks and you won't need more than 2 slots.
-The fans are very nice, even in a pull configuration where it's rare for the lights not to be exposed.
The case had a broken front grille at the bottom since I received it (photo). I didn't know if it was the fault of the shipping company or the ones who assembled it at the factory. I believe the damage occurred during assembly because if you remove the fans and try to put them back so that the cables are close to the hole, then one fan will not have the cut on the edges but the circle. So instead of the front glass fitting easily, it doesn't fit and obviously those who made this mistake forced it and broke the grille.
-On the sides, only 2 140mm fans fit unless you add a third one that will only be supported by the bottom screws, I didn't notice this either. They could easily fit 3, but because the case is for custom liquid cooling, the rails are not designed for a third fan alone. This gap above the side fans also shows that the case is for liquid cooling and not All in One.
-The provided ARGB 3 pin cable is just long enough to connect from the motherboard to the controller so that the 3 fans can be controlled, apart from the reset button and the controller, and from the motherboard for additional effects. The cable should have been longer to reach and connect to the bottom slots. If you have a graphics card with 3 fans, I don't think it's enough to connect to the bottom slots, you will use an upper ARGB slot.
-The reset button that changes the fan effects makes noise, but the effects through the motherboard's software are better and offer more options, so I don't use it much. Either I press it for 3 seconds to control the effects from the motherboard's software or I choose the solid lighting from the available options.
The reset button can either be connected to the Thermaltake controller and change the default lighting profile of the controller, or you can connect it to the motherboard and it will be the computer's reset.
In general, this controller wouldn't bother me at all if it didn't exist, but it is needed for 6 pin fans. If I could find 4 pin white ARGB fans of 200mm, I would replace them and get rid of the controller. I think it's simply there for older motherboards that don't have ARGB capabilities. With its intervention, there is no possibility of separate effect settings for each fan.
If you remove one fan from fan1 or fan2 position (I replaced the 120mm fan that I think was in a random position), then the lighting of the other 2 fans doesn't work. Or the lighting may only work for 1 of the 2 200mm fans.
-The volume and weight are a problem, it needs to be placed somewhere stable.
I regret not buying a midi tower. I got a full tower because I wanted 200mm fans so they wouldn't spin too much. If I were to buy now, I would look for a white case again with 140mm fans in the front and back, and with a well-opened top where I would place the liquid cooling as the optimal position. Although from reviews on midi cases I saw people who had a problem with the size of the power supply.
-The screws and the turns are not all good.
-If you put the liquid cooling on top with flow upwards and you don't have side fans then air will come out from the side grilles on the right, passing through the top gap into the second compartment, I had the case on my left and the air was coming out on top of me and bothering me. So I had the case in a diagonal position. If I put the case on the right then the air that comes out from the top side near the windows would still bother me. Although I have now removed the entire top part of the case so the main volume of air escapes quickly. By removing the top part, the liquid temperature drops up to 3 degrees.
-300mm graphics card if you put custom liquid cooling, otherwise max length 440mm. The Gigabyte Aorus, which has a width of 163mm, barely fits and I dare not remove it.
tldr Είναι πολύ όμορφο αλλά απευθύνεται σε αυτούς που θα βάλουνε custom υδρόψυξη.
Τα τζαμάκια κάνουν καλή δουλειά μόνο στο φιλτράρισμα σκόνης και κακή δουλειά άμα σκέφτεσαι να απομακρύνεις από τα πλαϊνά ανοίγματα ζέστη ή να εισέρχεται μεγάλος όγκος αέρα. Πολύ μεγάλο και με μόνο 2 θέσεις hdd 3.5''. Επίσης μην αγοράζετε κουτί με controller, αφήστε των έλεγχο όλων στην μητρική.
https://www.thermaltake.com/view-51-tempered-glass-argb-snow-edition.html
Tο airflow το σχεδίασαν να παίρνει το κουτί αέρα από πάνω και να τον στέλνει κάτω. Προφανώς γιατί το κουτί είναι μεγάλο και σκέφτηκαν ότι ο κόσμος θα το έχει στο πάτωμα, οπότε είναι ο καλύτερος τρόπος να μην γεμίζει σκόνες.
Όμως άμα διαλέξω να βάλω την υδρόψυξη πάνω τότε ο ζεστός αέρας πέφτει κατευθείαν πάνω στο VRM, ακόμα και άμα μετακινήσω την θέση της πάνω σχάρας προς το πορτάκι. Οπότε δεν το θεωρώ καλή ιδέα. Tο δοκίμασα και η θερμοκρασία στους επεξεργαστές μου είναι 1 βαθμό πάνω με το που ανοίγει ο υπολογιστής και το υγρό φτάνει τους 2 βαθμούς πάνω σύντομα με τον επεξεργαστή στους 3-4 βαθμούς πάνω. Όπως δεν θεωρώ πολύ καλή ιδέα να περνάει ο ζεστός αέρας από μέσα άμα βάλω την υδρόψυξη μπροστά ή πλάγια.
Όπως το σχεδίασαν η καλύτερη θέση για υδρόψυξη είναι κάτω, αφαιρείται η σχάρα που φιλτράρει τον αέρα κάτω και οι θέσεις για επιπλέον σκληρούς δίσκους. Όμως στην ΑΙΟ υδρόψυξη που έχω εγώ δεν φτάνουν οι σωλήνες για να μπει το ψυγείο κάτω (photo).
Έτσι αφού έχω το κουτί πάνω σε γραφείο έβαλα την υδρόψυξη πάνω με ανάποδο flow από κάτω προς τα πάνω χωρίς να φοβάμαι τις σκόνες. Πάνω από την υδρόψυξη αρχικά δοκίμασα και τους 2 ανεμιστήρες των 200mm(οι οποίοι χρειαζόταν ανύψωση με τις αυτοκόλλητες ροδέλες που περιλαμβανόταν στο κουτίl). Επειδή όμως intake αέρα δεν είχα αποφάσισα ότι είναι κακή ιδέα η push pull διάταξη προς τα πάνω.
Τα τζαμάκια είναι καλά για intake να φιλτράρουν τον αέρα, αλλά είναι χάλια για την απομάκρυνση μεγάλου όγκου αέρα. Με την αφαίρεση του πάνω μέρους και ροή αέρα κάτω προς τα πάνω η θερμοκρασία υγρού ΑΙΟ υδρόψυξης είναι 2 βαθμούς κάτω. Αλλά επειδή δεν έβαζα το πάνω μέρος την νύχτα που έκλεινα τον υπολογιστή γέμισε το κουτί μέσα σκόνες. Αυτό το έλυσα βάζοντας στον κενό χώρο δίπλα στο ψυγείο την κάτω σχάρα που φιλτράρει τον αέρα από κάτω, και έχοντας αφαιρεμένο το πάνω μέρος του κουτιού οριστικά.
Οπότε 3 αστεράκια για τον άκαμπτο σχεδιασμό του airflow του κουτιού.
Για την 6pin σύνδεση των τριών fan, γιατί οι fan ελέγχονται από controller+μητρική μόνο και οι 3 μαζί. Ήδη άλλαξα τον 120mm με 4pin+argb για να έχω αυτόν στο πίσω μέρος που δεν το βλέπω με φωτισμό και τους μπροστά των 200mm τους έχω συνήθως με κλειστό φωτισμό.
Για το καλώδιο motherboard-controller που εγώ θα το ήθελα λίγο μεγαλύτερο.
Και το χειρότερο είναι ότι δεν μπορείς να βάλεις πολλούς σκληρούς δίσκους, ένα midi case όπως αυτό https://www.skroutz.gr/s/36151834/Phanteks-Eclipse-P600S-Gaming-Midi-Tower-%CE%9A%CE%BF%CF%85%CF%84%CE%AF-%CE%A5%CF%80%CE%BF%CE%BB%CE%BF%CE%B3%CE%B9%CF%83%CF%84%CE%AE-%CE%BC%CE%B5-%CE%A0%CE%BB%CE%B1%CF%8A%CE%BD%CF%8C-%CE%A0%CE%B1%CF%81%CE%AC%CE%B8%CF%85%CF%81%CE%BF-Matte-White.html?from=account_favorites
παράδειγμα έχει θέσεις για περισσότερους σκληρούς δίσκους από ότι αυτό που είναι full tower, τζάμπα το μέγεθος, μόνο για custom υδρόψυξη χρειάζεται αυτό το κουτί. Το γράφει στις πληροφορίες αλλά δεν το κοίταξα, νόμιζα ότι έμπαιναν hdd κάτω. Χρειάζεται hdd cage που δεν υπάρχει. Οι αντάπτορες 2.5 σε 3.5 δεν κάνουν, έχουν μέγεθος σκληρού δίσκου 3.5'' και δεν χωράνε 3.5'' δίσκο https://www.skroutz.gr/c/681/aksesouar-case/f/996515/HDD-SSD-Bracket.html
Βέβαια άμα δεν έχετε ένα σωρό παλιούς σκληρούς αγοράζεται 2 δίσκους των 4Τ και δεν χρειάζεστε περισσότερες από 2 θέσεις.
-Οι ανεμιστήρες είναι πολύ όμορφοι ακόμα και σε pull διάταξη που νομίζω ότι είναι σπάνιο να μην εκτίθενται τα λαμπάκια.
Το κουτί είχε από τότε που το παρέλαβα κάπως σπασμένη την μπροστά σχάρα στο κάτω μέρος (photo). Δεν ήξερα άμα έφταιγε η μεταφορική ή αυτοί που το συναρμολόγησαν στο εργοστάσιο. Πιστεύω η ζημιά έγινε κατά την συναρμολόγηση επειδή άμα βγάλεις τους ανεμιστήρες και πας να τους βάλεις ώστε τα καλώδια να είναι κοντά στην τρύπα τότε ο ένας ανεμιστήρας δεν θα έχει το κόψιμο στις άκρες αλλά τον κύκλο. Έτσι μετά το μπροστά τζαμάκι αντί να κουμπώνει με ευκολία δεν μπαίνει και προφανώς αυτοί που έκαναν αυτό το λάθος το ζόρισαν και έσπασε η σχάρα.
-Στα πλάγια μπαίνουν μόνο 2 140mm ανεμιστήρες εκτός και αν βάλετε τρίτο που θα στηρίζεται μόνο με τις κάτω βίδες, ούτε αυτό το είχα προσέξει. Θα μπορούσαν άνετα να μπαίνουν 3 αλλά επειδή το κουτί είναι για custom υδρόψυξη δεν έχουν σχεδιαστεί οι ράγες για σκέτο 3ο ανεμιστηράκι. Αυτό το κενό που υπάρχει πάνω από τους πλαϊνούς ανεμιστήρες δείχνει και αυτό ότι το κουτί είναι για υδρόψυξη που δεν είναι All in One.
-Το ARGB 3 pin καλώδιο που δίνουν φτάνει ίσα ίσα για να συνδεθεί από την μητρική στον controller ώστε οι 3 ανεμιστήρες να ελέγχονται εκτός από το κουμπάκι reset και τον controller, και από την motherboard για επιπλέον εφέ. Το καλώδιο έπρεπε να είναι μακρύτερο για να φτάνει να συνδεθεί και στις κάτω θέσεις. Άμα έχετε κάρτα γραφικών με 3 ανεμιστήρες δεν νομίζω ότι φτάνει για να συνδεθεί στις κάτω υποδοχές, θα χρησιμοποιήσετε μία πάνω υποδοχή ARGB.
https://www.skroutz.gr/s/33715486/Kolink-ARGB-3-Pin-Extension-50cm.html
https://www.youtube.com/watch?v=vB3wO7g7zJM
2:50
-Το κουμπάκι reset που αλλάζει εφέ στους ανεμιστήρες κάνει θόρυβο, αλλά τα εφέ μέσω κάποιου προγράμματος της μητρικής είναι καλύτερα και περισσότερα οπότε δεν το χρησιμοποιώ πολύ. Είτε το πατάω για 3sec να ελέγχω τα εφέ από το πρόγραμμα της μητρικής είτε από τις επιλογές που έχει διαλέγω τον κλειστό φωτισμό.
Tο reset button ή θα συνδέεται στον controller της Thermaltake και θα αλλάζει προφίλ default φωτισμού του controller ή θα το συνδέσετε στην motherboard και θα είναι το reset του υπολογιστή.
Γενικά αυτός ο controller και να μην υπήρχε δεν θα με πείραζε καθόλου αλλά χρειάζεται για 6 pin fans. Άμα μπορούσα να βρω 4 pin argb λευκούς ανεμιστήρες 200mm θα τους άλλαζα και θα πετούσα τον controller. Νομίζω απλά υπάρχει για τις παλιότερες μητρικές που δεν έχουν ARGB δυνατότητες. Με την διαμεσολάβηση του δεν δίνεται η δυνατότητα ξεχωριστής ρύθμισης εφέ σε κάθε ανεμιστήρα.
Άμα βγάλετε ενα ανεμιστηράκι από την θέση fan1 ή fan2 (αντικατέστησα εγώ τον 120mm που νομίζω τον είχαν σε τυχαία θέση) τότε ο φωτισμός των άλλων 2 ανεμιστήρων δεν δουλεύει. Ή μπορεί να δουλεύει ο φωτισμός μόνο για τον 1 από τους 2 των 200mm.
-Ο όγκος και το βάρος είναι πρόβλημα, πρέπει να πατάει κάπου σταθερά.
Μετάνιωσα που δεν αγόρασα midi tower. Πήρα full tower γιατί ήθελα ανεμιστήρες 200mm ώστε να μην γυρίζουν πολύ. Αν αγόραζα τώρα θα κοιτούσα κάποιο case λευκό πάλι με 140mm ανεμιστήρες μπρος πίσω και με καλά ανοιχτό το πάνω μέρος που θα έβαζα την υδρόψυξη σαν βέλτιστη θέση. Αν και από κριτικές σε midi case είδα άτομα που είχαν πρόβλημα με το μέγεθος του τροφοδοτικού.
-Οι βίδες και οι στροφές δεν είναι όλες καλές.
-Άμα βάλετε την υδρόψυξη πάνω με flow προς τα πάνω και δεν έχετε και πλαϊνά ανεμιστηράκια τότε θα βγαίνει αέρας από τις σίτες πλάγια δεξιά περνώντας και από το πάνω κενό στο 2ο διαμέρισμα, είχα το κουτί αριστερά μου και έβγαινε ο αέρας πάνω μου και με ενοχλούσε.Έτσι είχα το κουτί σε διαγώνια θέση. Αν έβαζα το κουτί δεξιά τότε πάλι θα ενοχλούσε ο αέρας που βγαίνει από πάνω πλάι από τα τζαμάκια. Αν και πλέον έχω αφαιρέσει όλο το πάνω κομμάτι του κουτιού οπότε ο κύριος όγκος του αέρα φεύγει πάνω και γρήγορα. Βγάζοντας το πάνω μέρος η θερμοκρασία υγρού πέφτει μέχρι και 3 βαθμούς.
-300mm κάρτα γραφικών άμα βάλετε custom υδρόψυξη, αλλιώς max length 440mm. Την Gigabyte Aorus που έχει πλάτος 163mm με τα ζόρια την χώρεσε και δεν τολμάω να την βγάλω.